CSV import is the most commonly used method for transferring small to medium-sized data sets from other applications into NetSuite. The CSV import process saves time and prevents errors, by submitting data in a CSV (comma-separated value) file. This data can add or update many records at one time, avoiding the need for manual data entryYou can save an import job to be run later. After you have saved an import, you can reuse its mapping for later import jobs and share it with other users. When you run an import, a status page is available for you to view its progress.
NetSuite provides an Import Assistant that you can use to step through the process for most CSV imports.
The Import Assistant is available at Setup > Import/Export > Import CSV Records
You can save an import job to be run later. After you have saved an import, you can reuse its mapping for later import jobs and share it with other users. When you run an import, a status page is available for you to view its progress.
Single file Import:
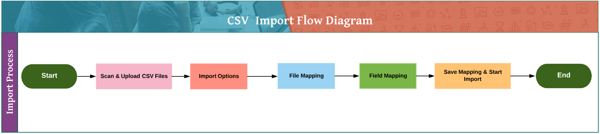
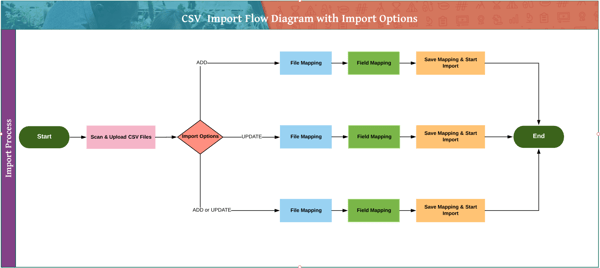
We have 5 steps in Import Process.
- Scan & Upload CSV file
- Import Options
- File Mapping
- Field Mapping
- Save mapping & Start Import
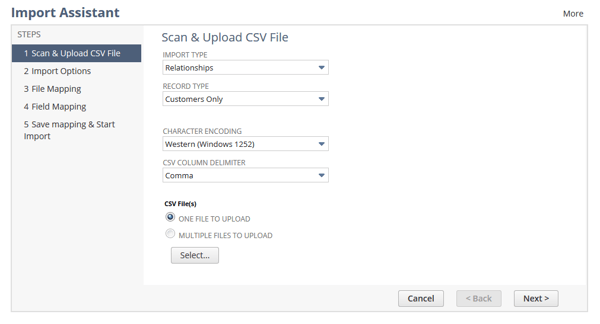
Scan & Upload CSV file:
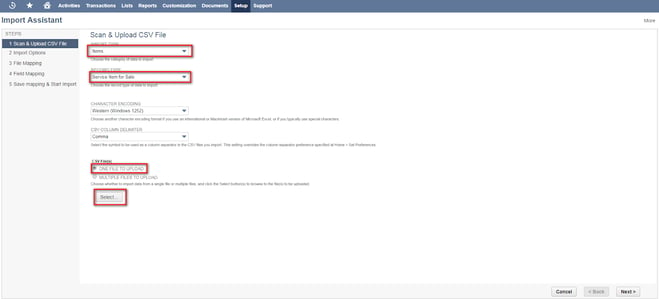
- Select the Items in Imports Type drop down.
- In Record Type drop down filtered Items related forms, after selecting Items in Imports Type.
- Select the Import excel file it should be in CSV (comma-separated value) file
- Then click ‘Next’ button.
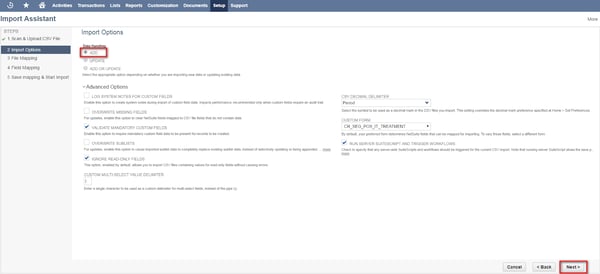
Import Options:
In Import options we have three options for Data Handling.
- ADD
- UPDATE
- ADD OR UPDATE
ADD - Select if all imported records are new to NetSuite.
UPDATE - Select if all imported records already exist in NetSuite, and the import is intended to modify these records.
ADD OR UPDATE - Select if imported records are a mixture of new and existing records.
Under advanced Options:
- If Validate Mandatory Custom Fields checkbox is checked, should give data for mandatory custom fields.
- If Validate Mandatory Custom Fields checkbox is Unchecked, should not give data for mandatory custom fields.
- Log System Notes For Custom Fields check box is checked, Enable this option to create system notes during import of custom field data. Impacts performance; recommended only when custom fields require an audit trail.
- Overwrite Missing Fields enable this option to clear NetSuite fields mapped to CSV file fields that do not contain data.
- Custom Multi-Select Value Delimiter This option we are using for Multi Select fields using pipe symbol (|).
- Custom Form should select which form you are importing the data.
- Click ‘Next’ button.
Field Mapping:

- Should map app all required fields from Excel fields and NetSuite fields.
- Click ‘Next’ button
Save Mapping and Start Import:
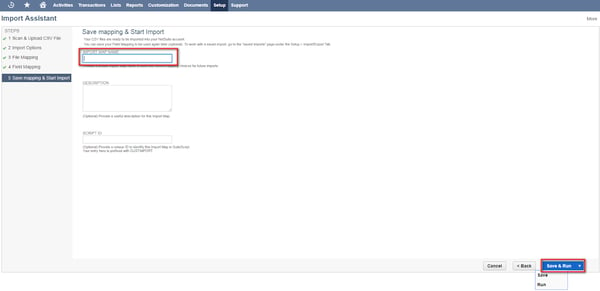
- Enter the Name of Import Mapping.
- The Import Mapping will be save in backend. you can reuse its mapping for later import.
- Click ‘Save & Run’ button.
Import Confirmation:
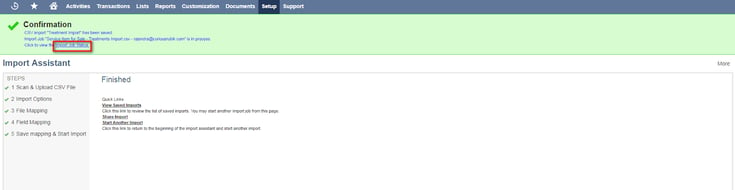
- After completion of import will display confirmation message.
- We have option for see Job Status from confirmation message.
- Click ‘Import Job Status’ to view Job status.
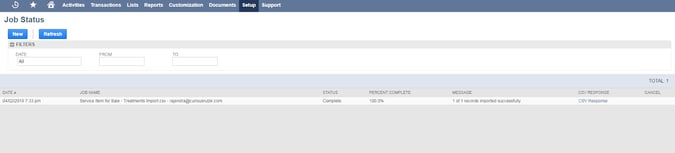
Job Status for Imported Single file:
- Below are the Imported Job Status.
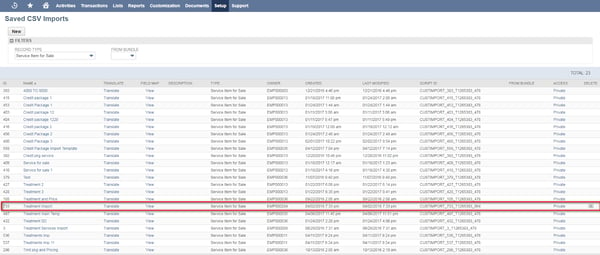
Saved CSV Imports:
We have option to see Saved CSV Imports. Below are the Navigation,
Navigation: Setup --> Import/Export --> Saved CSV Import
CSV Import Flow Diagrams:
Import Process:
Flow Diagram with Import Options:


 Twitter
 Linkedin
 Youtube
 Google +
 Face Book